Back to Maintenance Manager Main Menu
Assigning Work Orders
Administrators and Technicians have the ability to assign work orders to other users. Administrators can see an unassigned work order count on their Dashboard. By clicking on the Unassigned link they will automatically be taken to a list of Unassigned work orders.

- Click into a work order that needs to be assigned.
- Click on the magnifying glass located on the Assigned To line to choose users to assign to the work order. *Note: More than one user can be assigned to a work order.
- Click Save to update that work order.
Completing Work Orders
The Complete status on a work order indicates that the work has been done. When the status is changed to Complete, the Completion Date field becomes required and the date and time the status is changed will auto populate in that field. Transactions can still be added to a Complete status work order.
- To mark a work order Complete, search for the work order by entering the Work Order ID number in the Work Order ID search box. *Note: If the Work Order ID is not known, click on the Work Orders tab and utilize the filters to the right to search for work orders that need to be marked Complete.
- On the work order form, select Complete from the Status drop down list.
- Click Save.
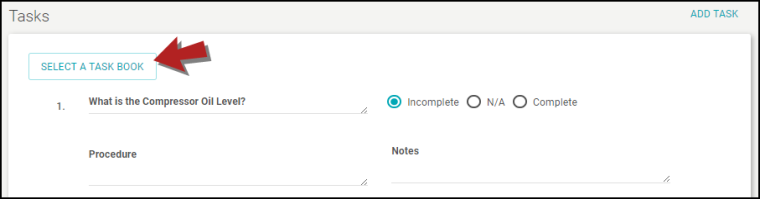
When completing work orders, ensure that Action Taken notes are entered in the Completion section of the work order to document what was done to resolve the problem or request. Also, if there are Tasks listed on the work order, be sure to select Incomplete, N/A, or Complete to reflect the current status of the task.
Editing the Task Book on a Work Order
On a work order, task list items copied from a Task Book can be edited, added to, or deleted. You can also select a new Task Book to add to or replace the current Task Book.
- To select a new Task Book on an existing work order, open the work order and click on the Select a Task Book button.
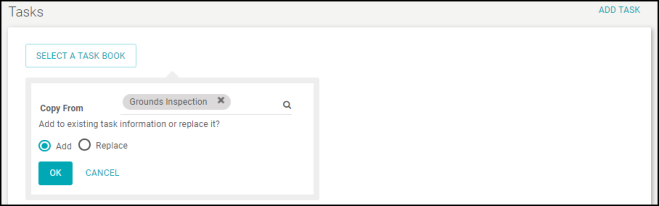
- Click on the magnifying glass to choose the Task Book you would like to copy. When copying a Task Book there are two options:
- Add - will add the selected task list to the current task list.
- Replace - will replace the existing task list with the newly selected one.
- Click the OK button when you're finished.
- Click Save on the work order to save those changes.
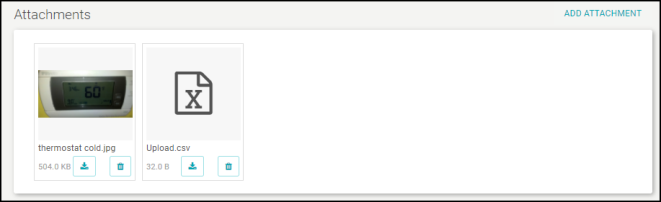
Adding Attachments to a Work Order
Attachments are a great way to document items on a work order. Examples of attachments are images, invoices, and documents pertaining to the work.
- To add an Attachment, open a work order and scroll down to the Attachments section.
- Click on Add Attachment. You are able to upload up to 100 attachments per work order.

- If the attachment is an image, you will see a preview of the image listed.
- Click on the preview of the image to see a larger version of it. *Note: There is no file size limit, however, images over 10MB will not generate a preview. Common file types you can attach are JPEG, PNG, PDF, Excel, and Word Documents.
- Click Save after adding all desired attachments.
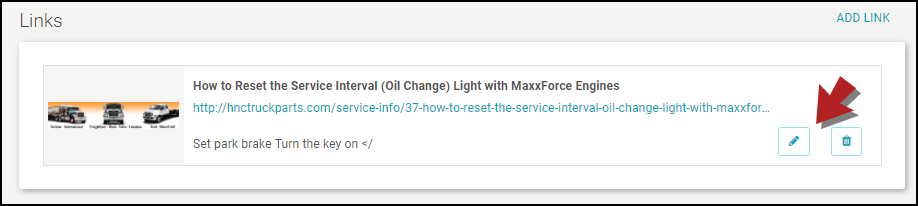
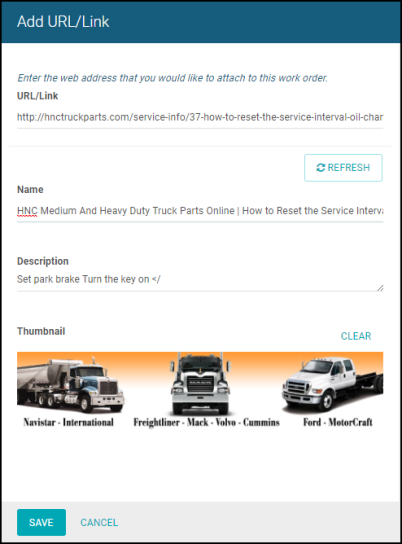
Adding Links to a Work Order
Links are a great way link manuals, how-to videos, and other resources to your work orders.
- To add a Link, open a work order and scroll down to the Links section.
- Click on Add Link.

-
In the side panel, enter the URL. *Note: When a URL is entered, the link's name, description, and thumbnail image will automatically populate if available. This information can be saved as-is or edited before saving.
- Click Save.
- Your link will now be visible on the work order. Click the pencil icon to edit the link or, click the trash can icon to delete it.